Deleting, adding projects, previews for guests, etc in a MixUp photo booth app.
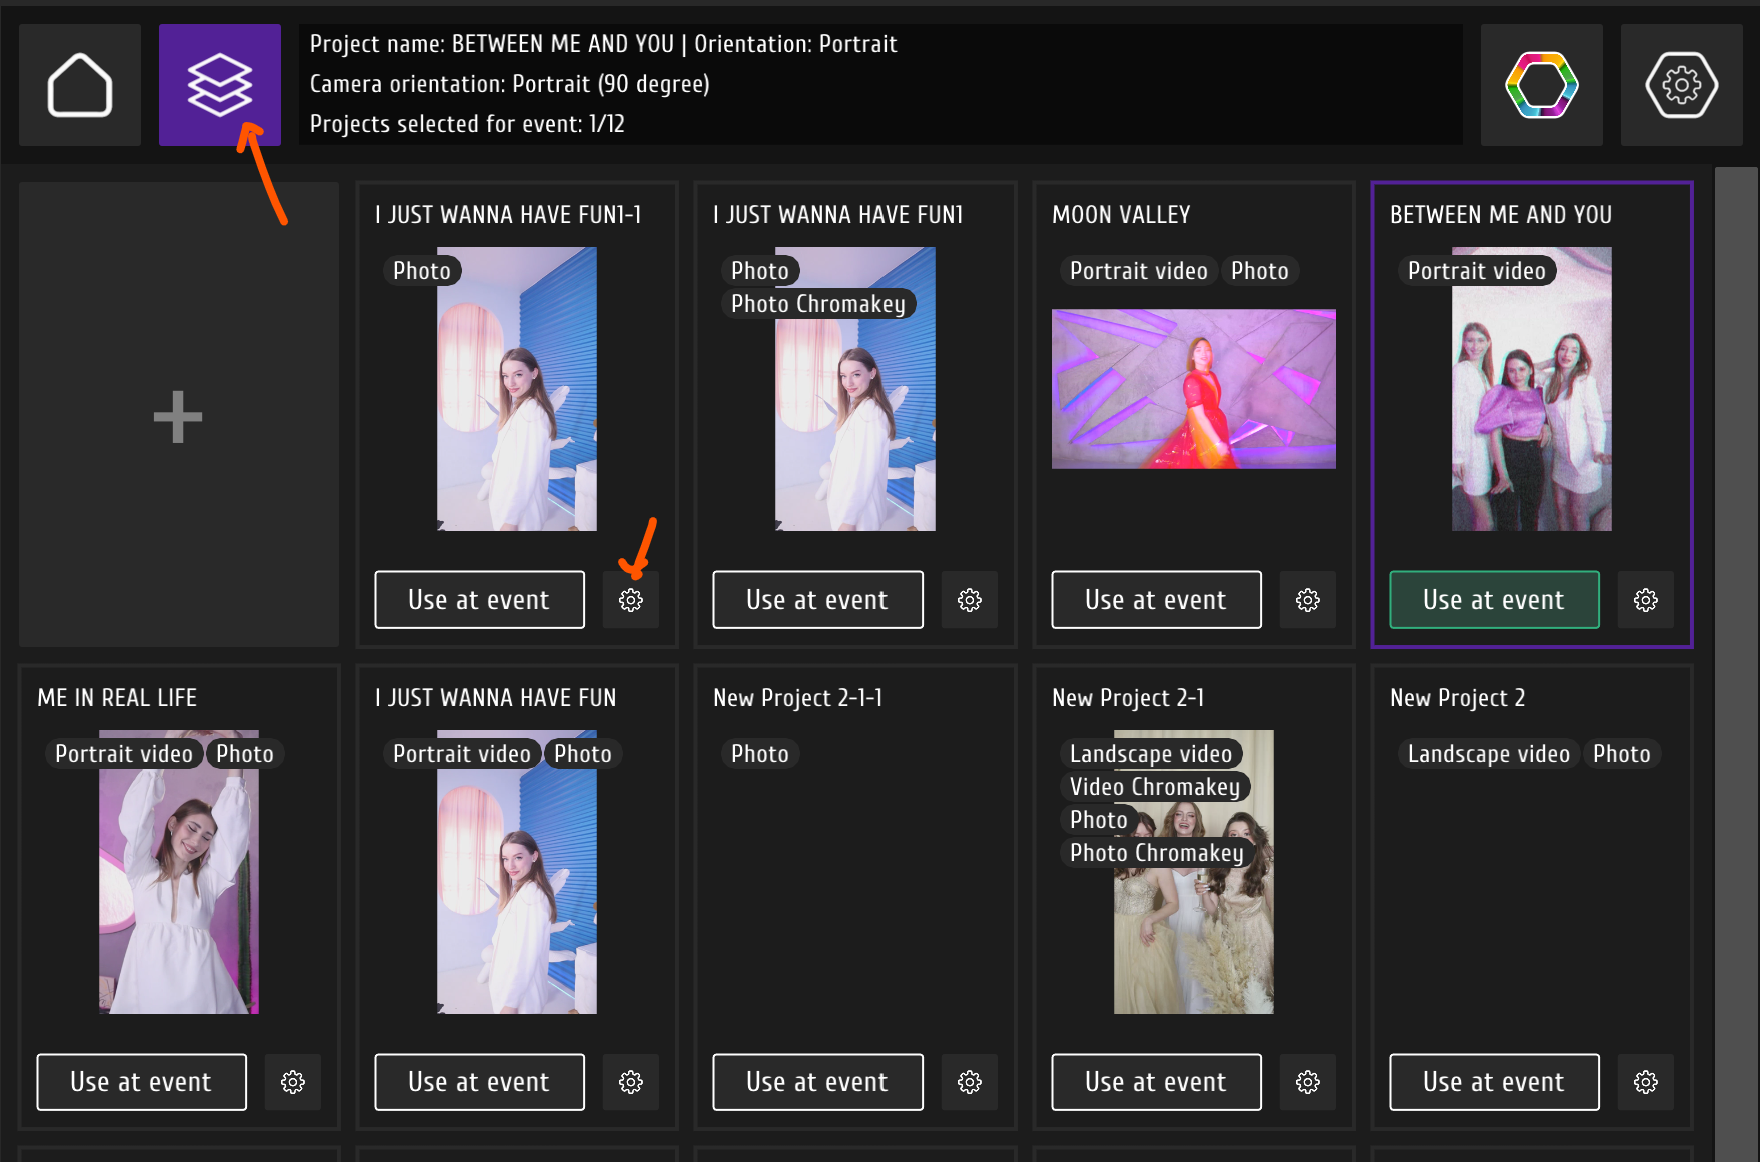
To open the project folder, you need to press the button in a left top corner which is highlighted on a screenshot.
Then press the gear icon next to the project, which preview you want to change.
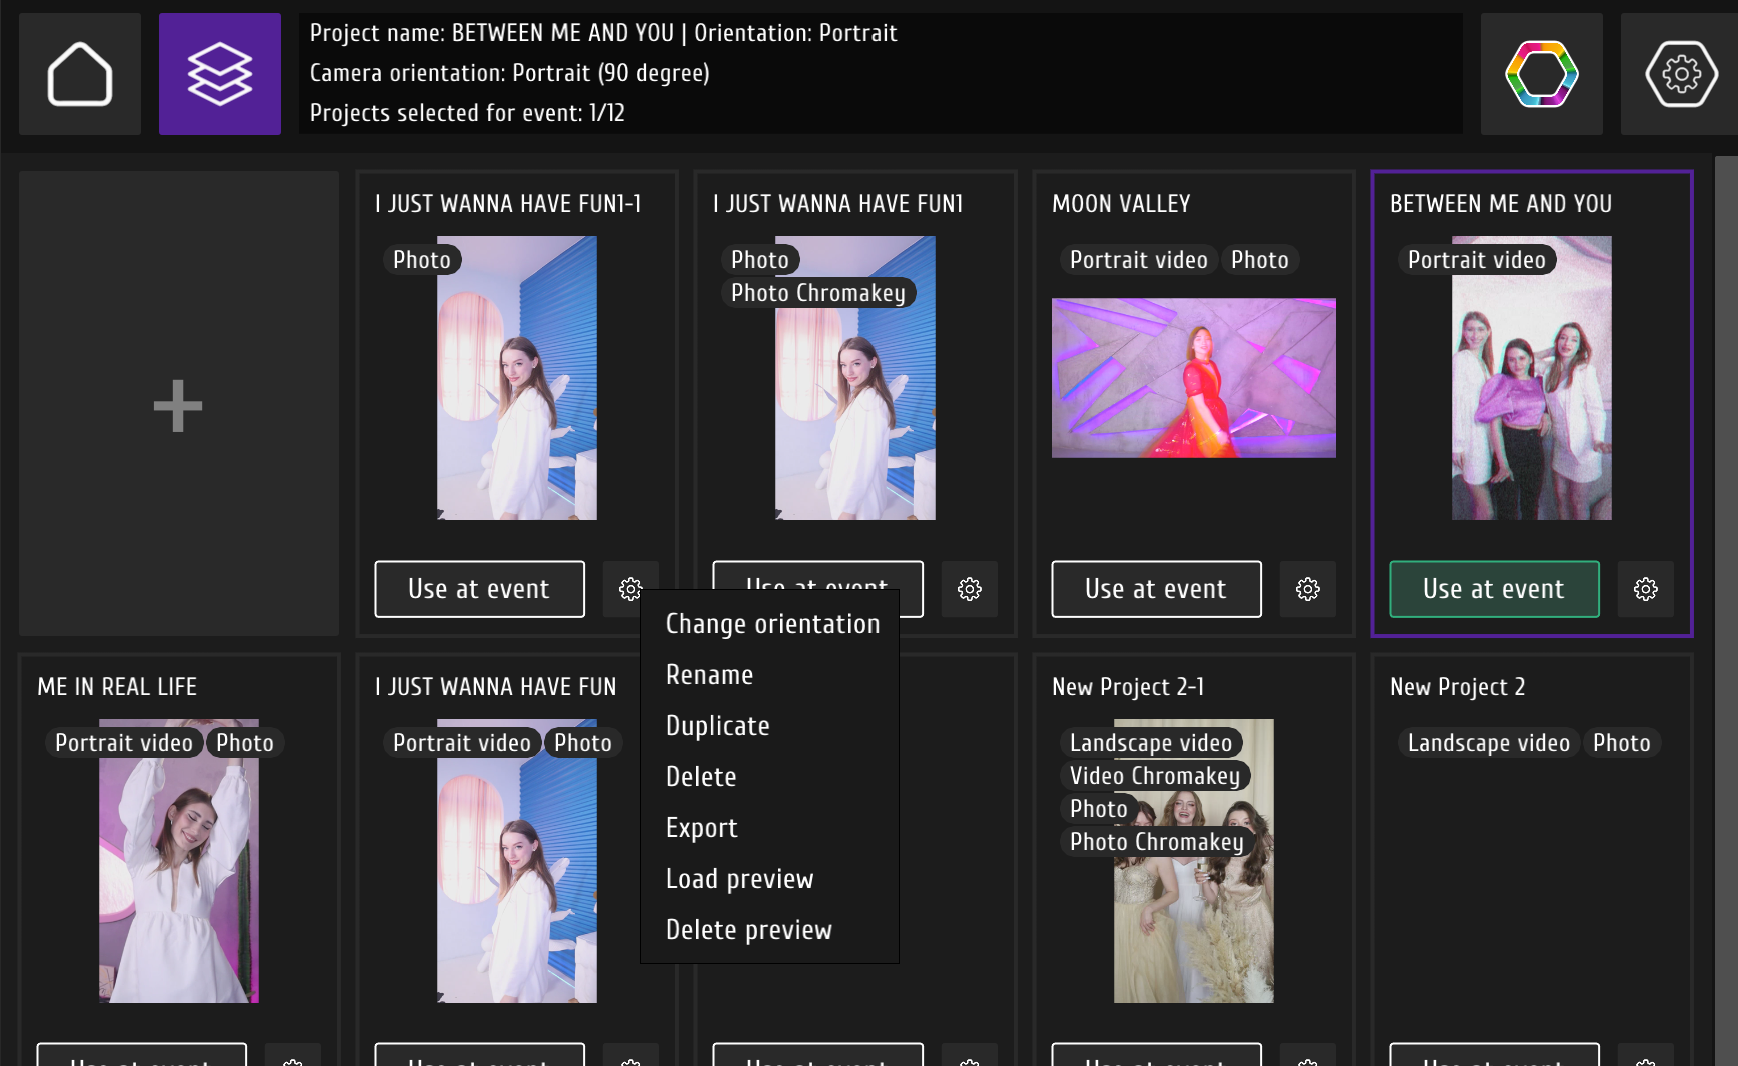
If you want to change the preview, then you need to select "load preview". It can be the photo or video. We mostly use the video that we render using the test button. If you decide to use one of our projects that we have in our collection, then it will already have the preview.
By the way, you can load prepared projects from this guide.
Please note that you only change preview of videos in this tab. Previews for photos are generated automatically.
If you want to use your own previews for photos:
Templates will be automatically taken from your template settings in the app, but you can use our own photos instead of the default pictures that we use.
For this, click at the gear tab in a main screen of the app and press "Select Custom Photo Preview".
Photos that you need for custom preview need to be 1080x1080.
You can use any photos that you like for it.
There are 2 different options:
for the regular photos (custom photo preview)
for chroma key.
Please note that for the chroma key preview, you need to load the file with a transparent background.
The preview will be generated automatically using the background that you use for your template.