Group control and Action scenes
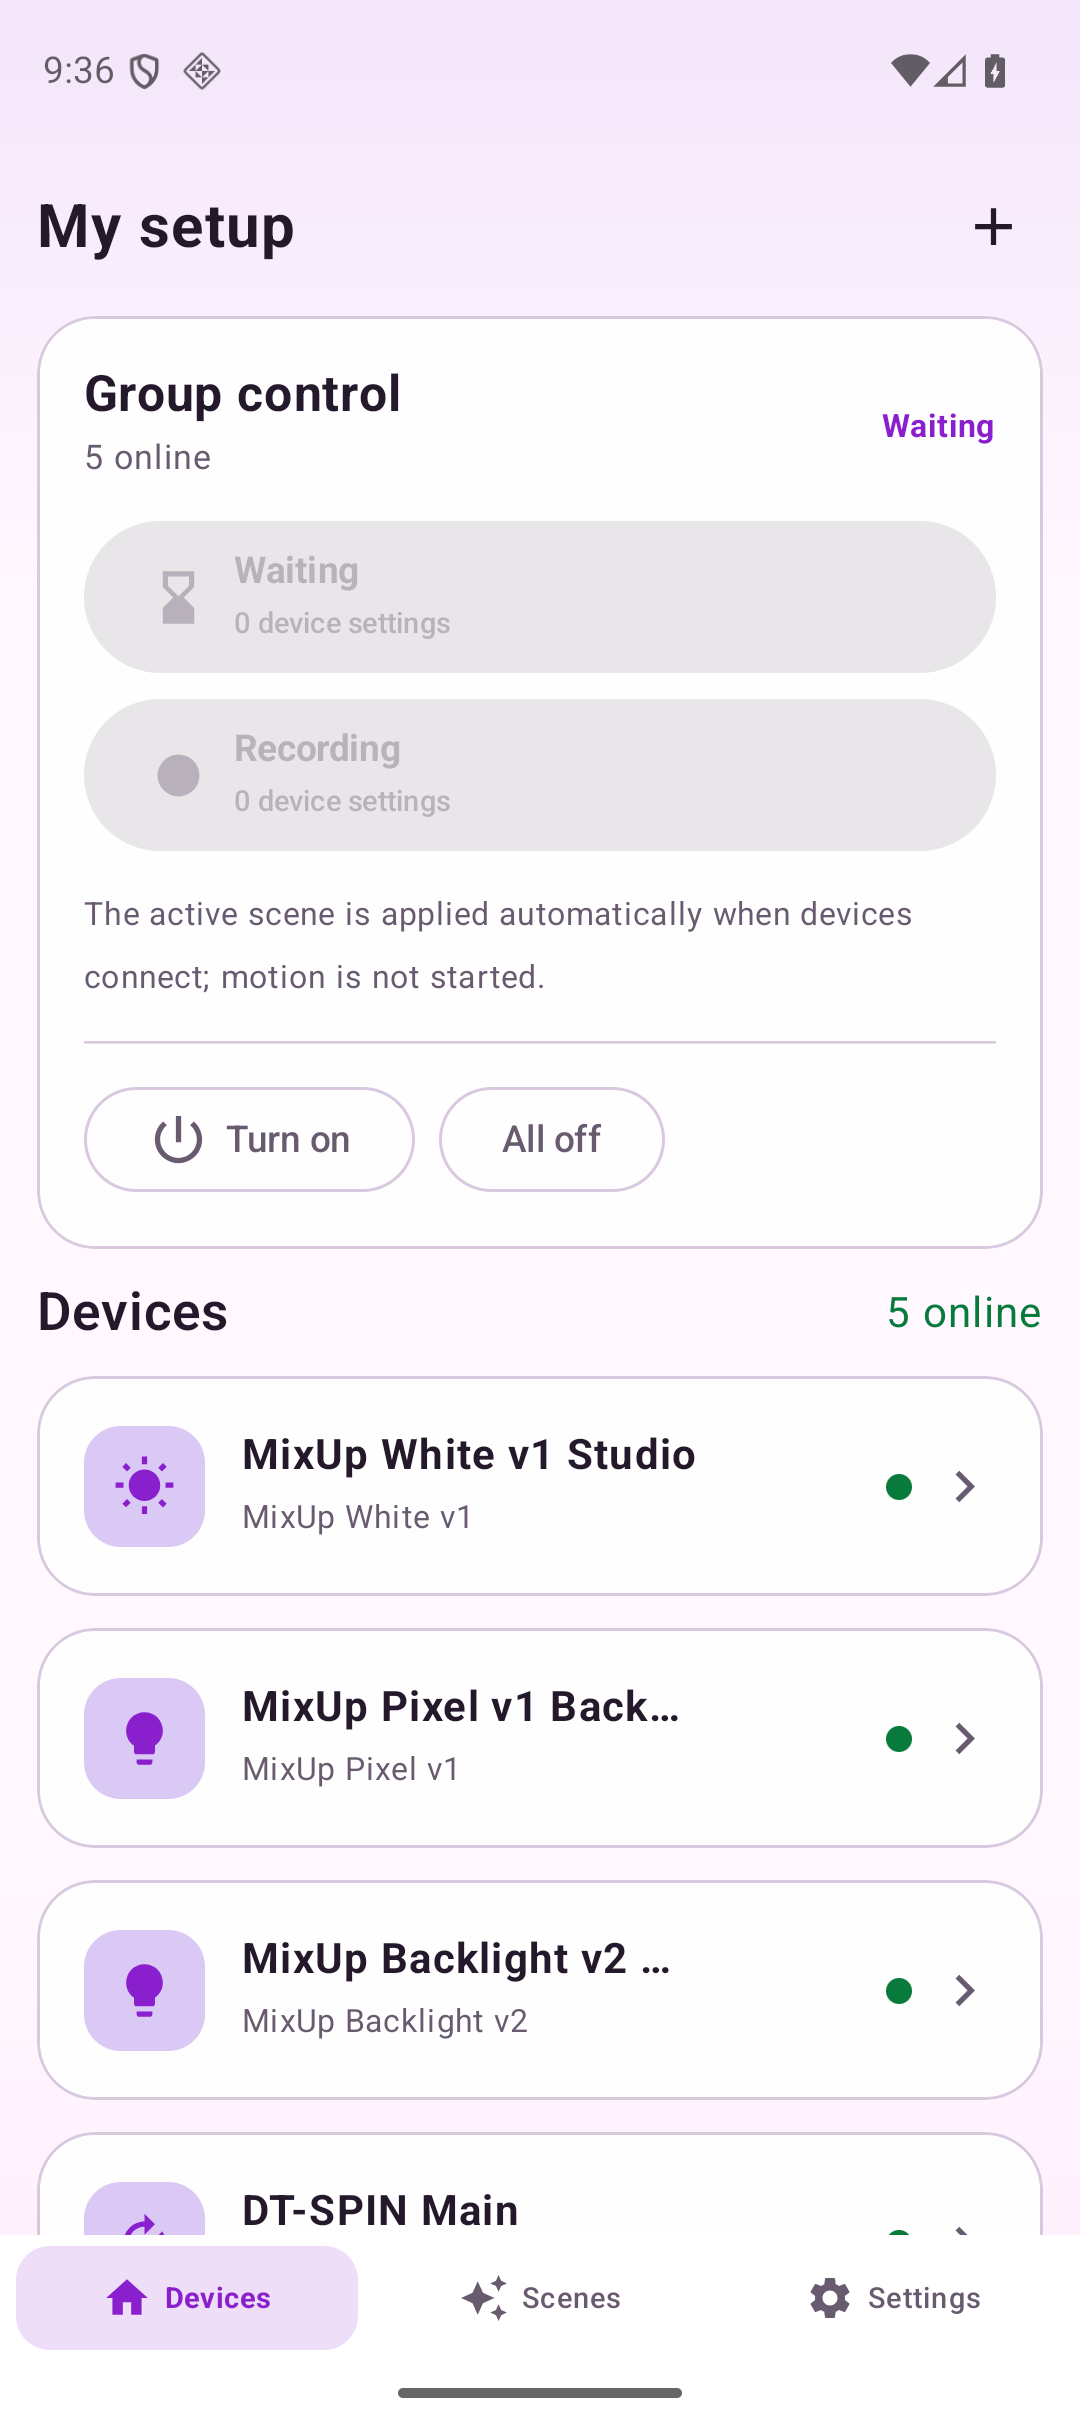
Group control combines lights, Spinner360, and GlamBot into one production setup. Its main purpose is to switch all prepared devices between two work states with one tap:
- Waiting — the state between takes: dimmed or decorative light, stopped mechanisms, and waiting-screen content;
- Recording — the capture state: working light, required screen content, and selected movement scenes.
These names describe a typical workflow, but you can use them as any two frequently switched configurations.
Why group control is useful
Section titled “Why group control is useful”- prepare the entire setup for a take with one tap;
- get consistent results across repeated captures;
- stop movement quickly and safely between takes;
- change lighting and robotic-camera state together;
- restore the active state after a temporary reconnection;
- remap a saved scene to a replacement controller of the same type.
Connect a group
Section titled “Connect a group”- Power on all hardware.
- Tap Find Devices.
- Select several required types, or select nothing to search for every device.
- Tap Connect for each BLE device.
- Wait until every required device is ready.
- Tap Open Dashboard.
MixUp Control App supports multiple simultaneous connections. The main dashboard shows how many devices are online.
Group-control screens
Section titled “Group-control screens”Device group
Section titled “Device group”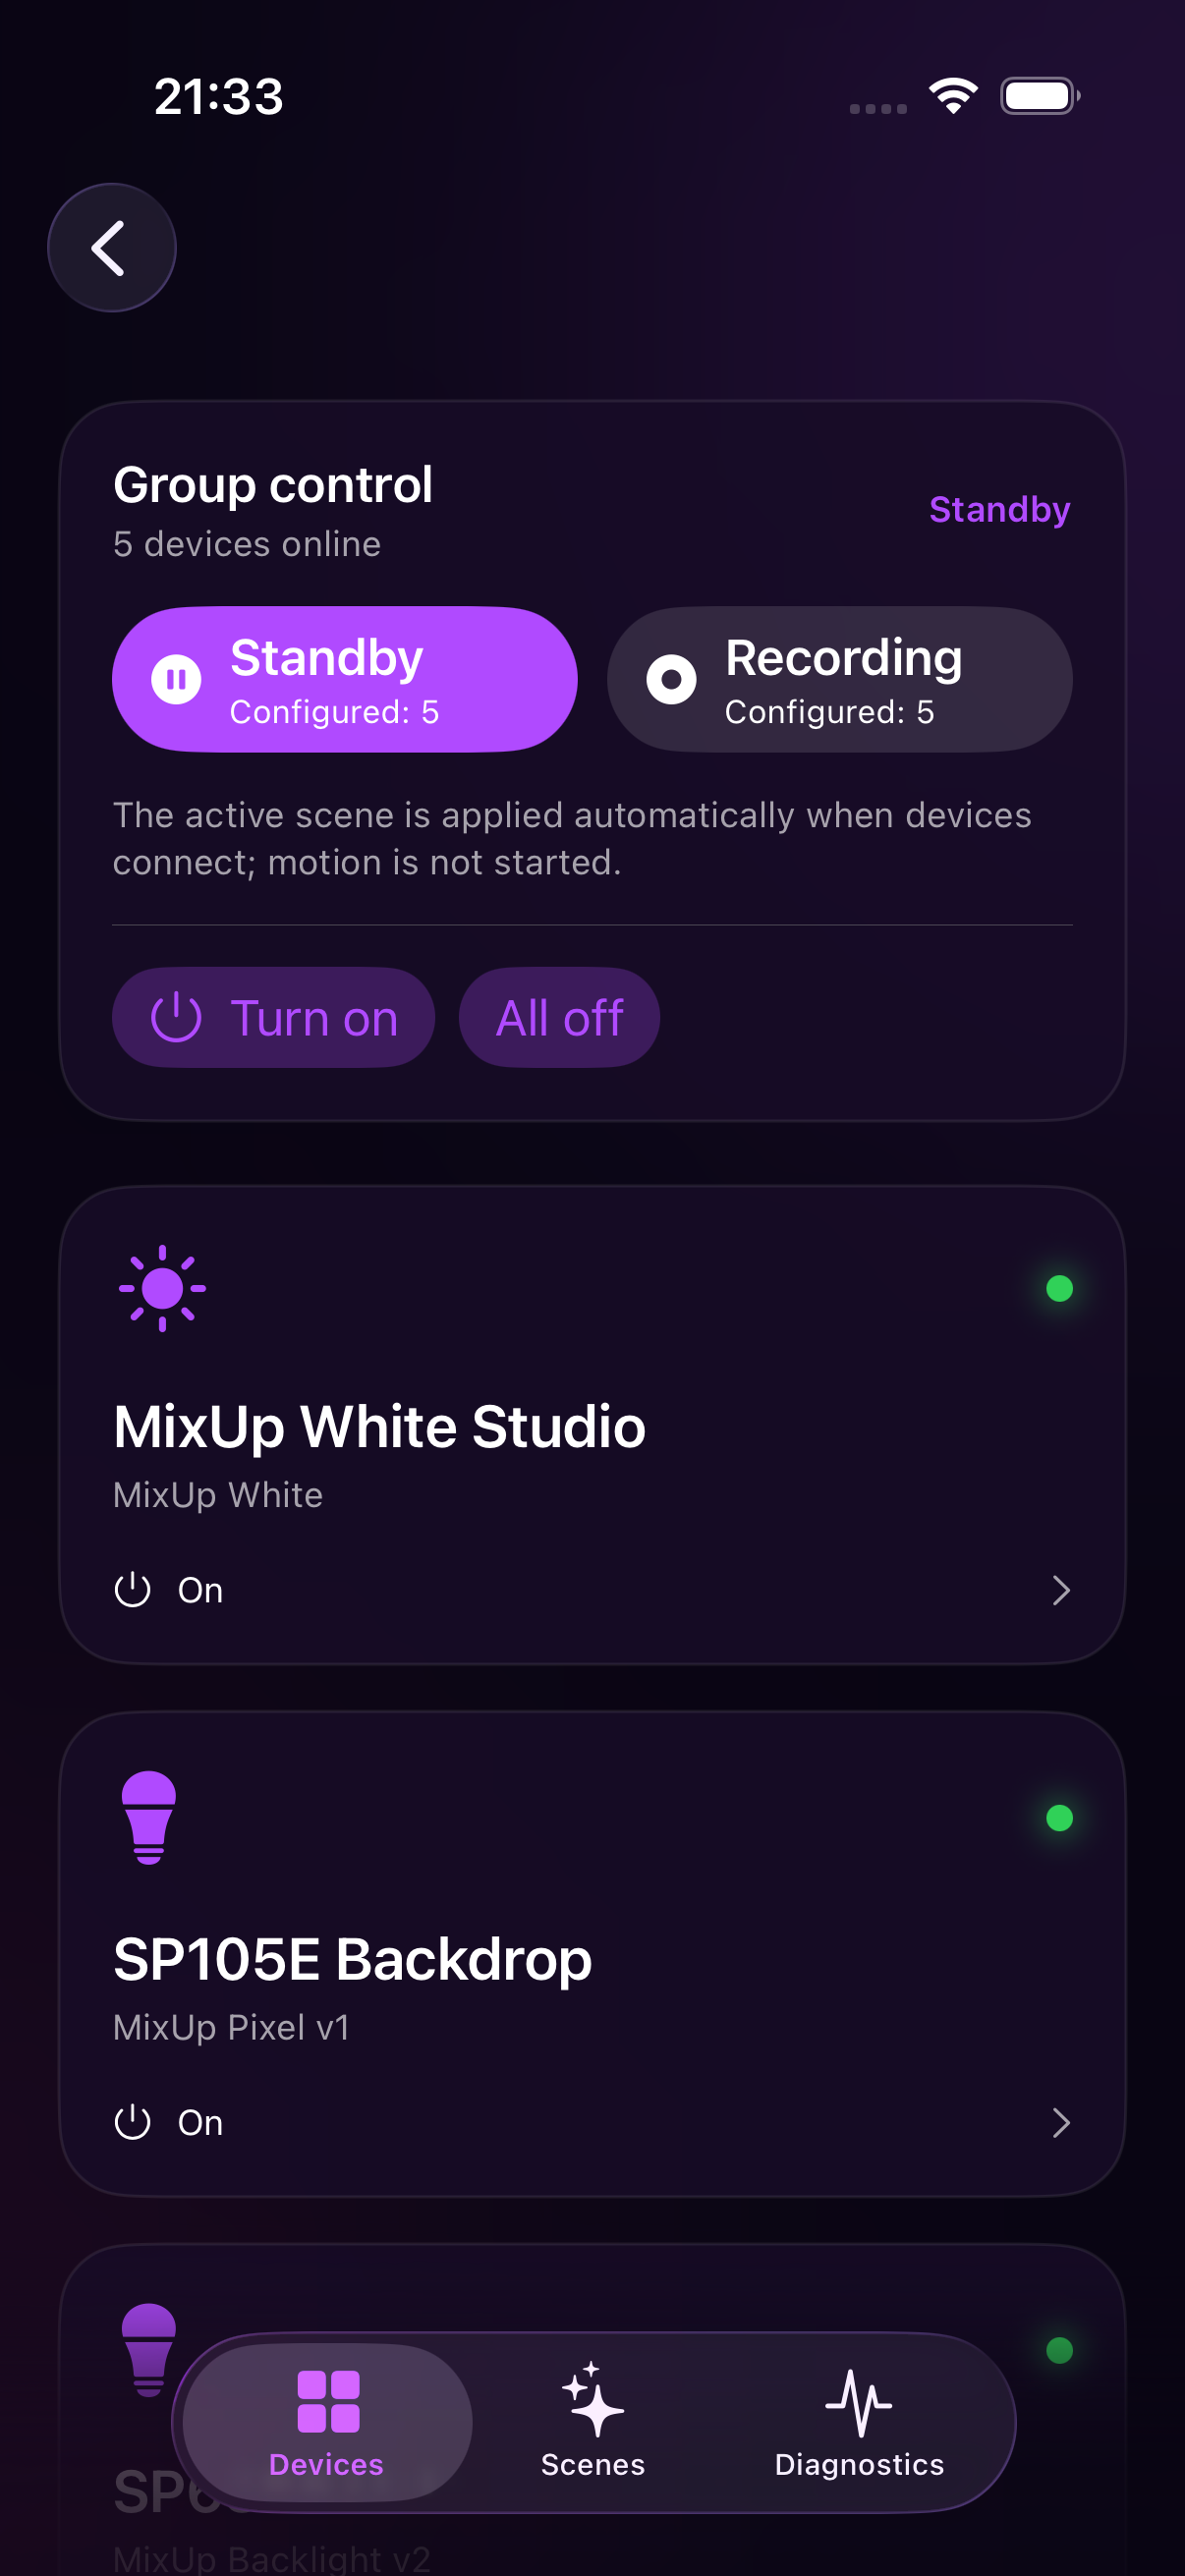
Action scenes
Section titled “Action scenes”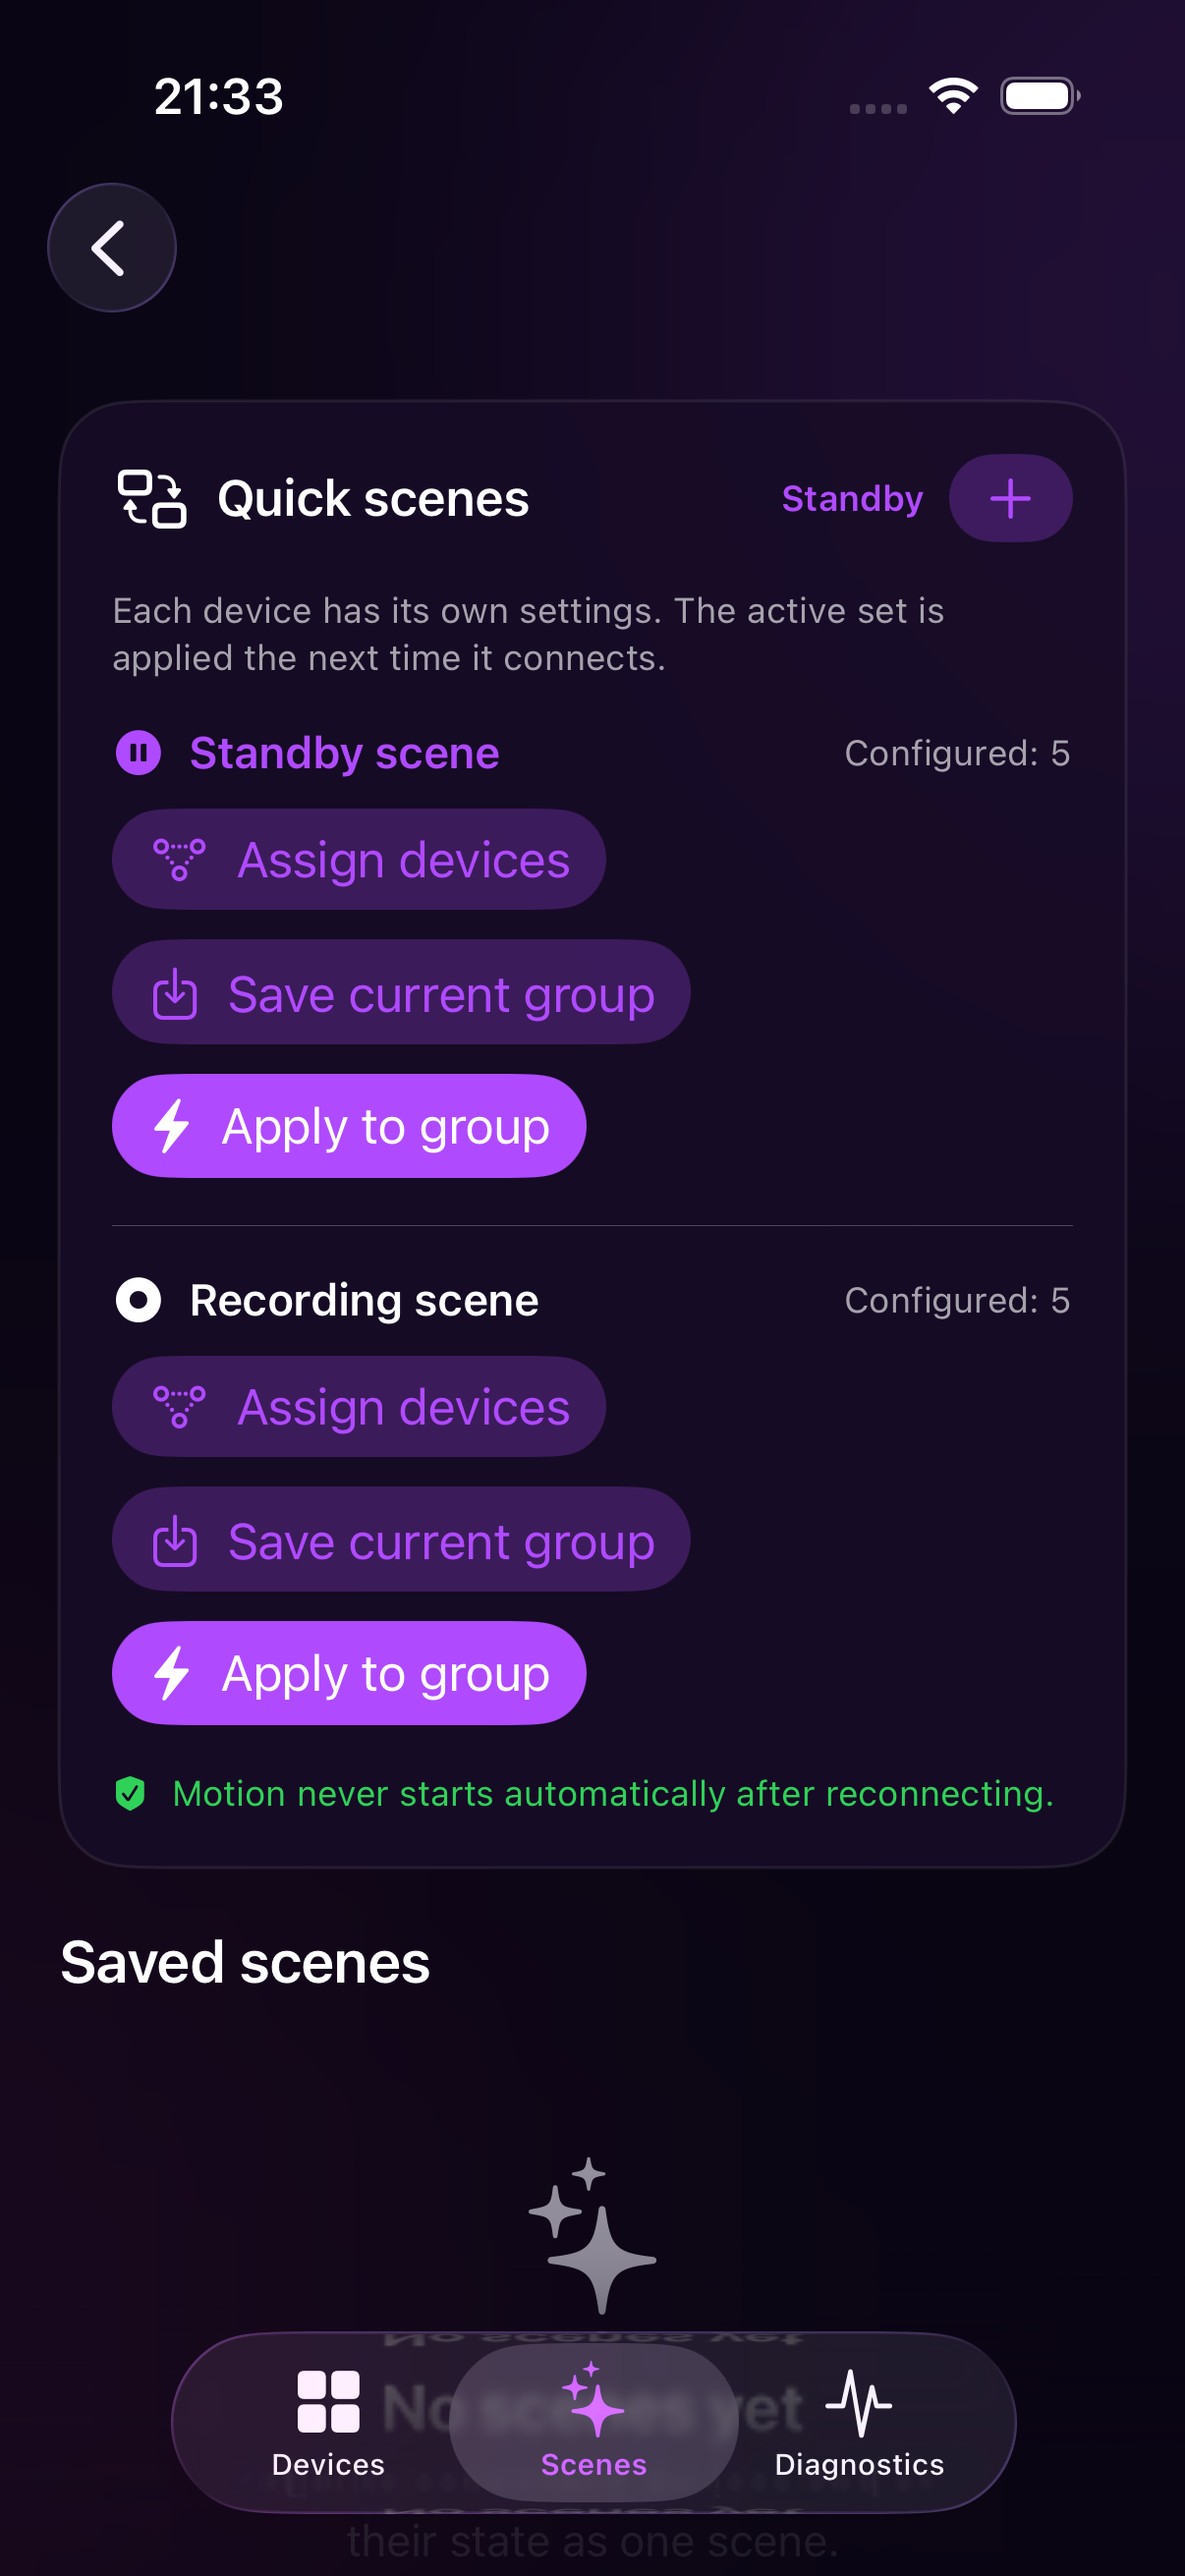
Two kinds of scenes
Section titled “Two kinds of scenes”Waiting and Recording Action scenes
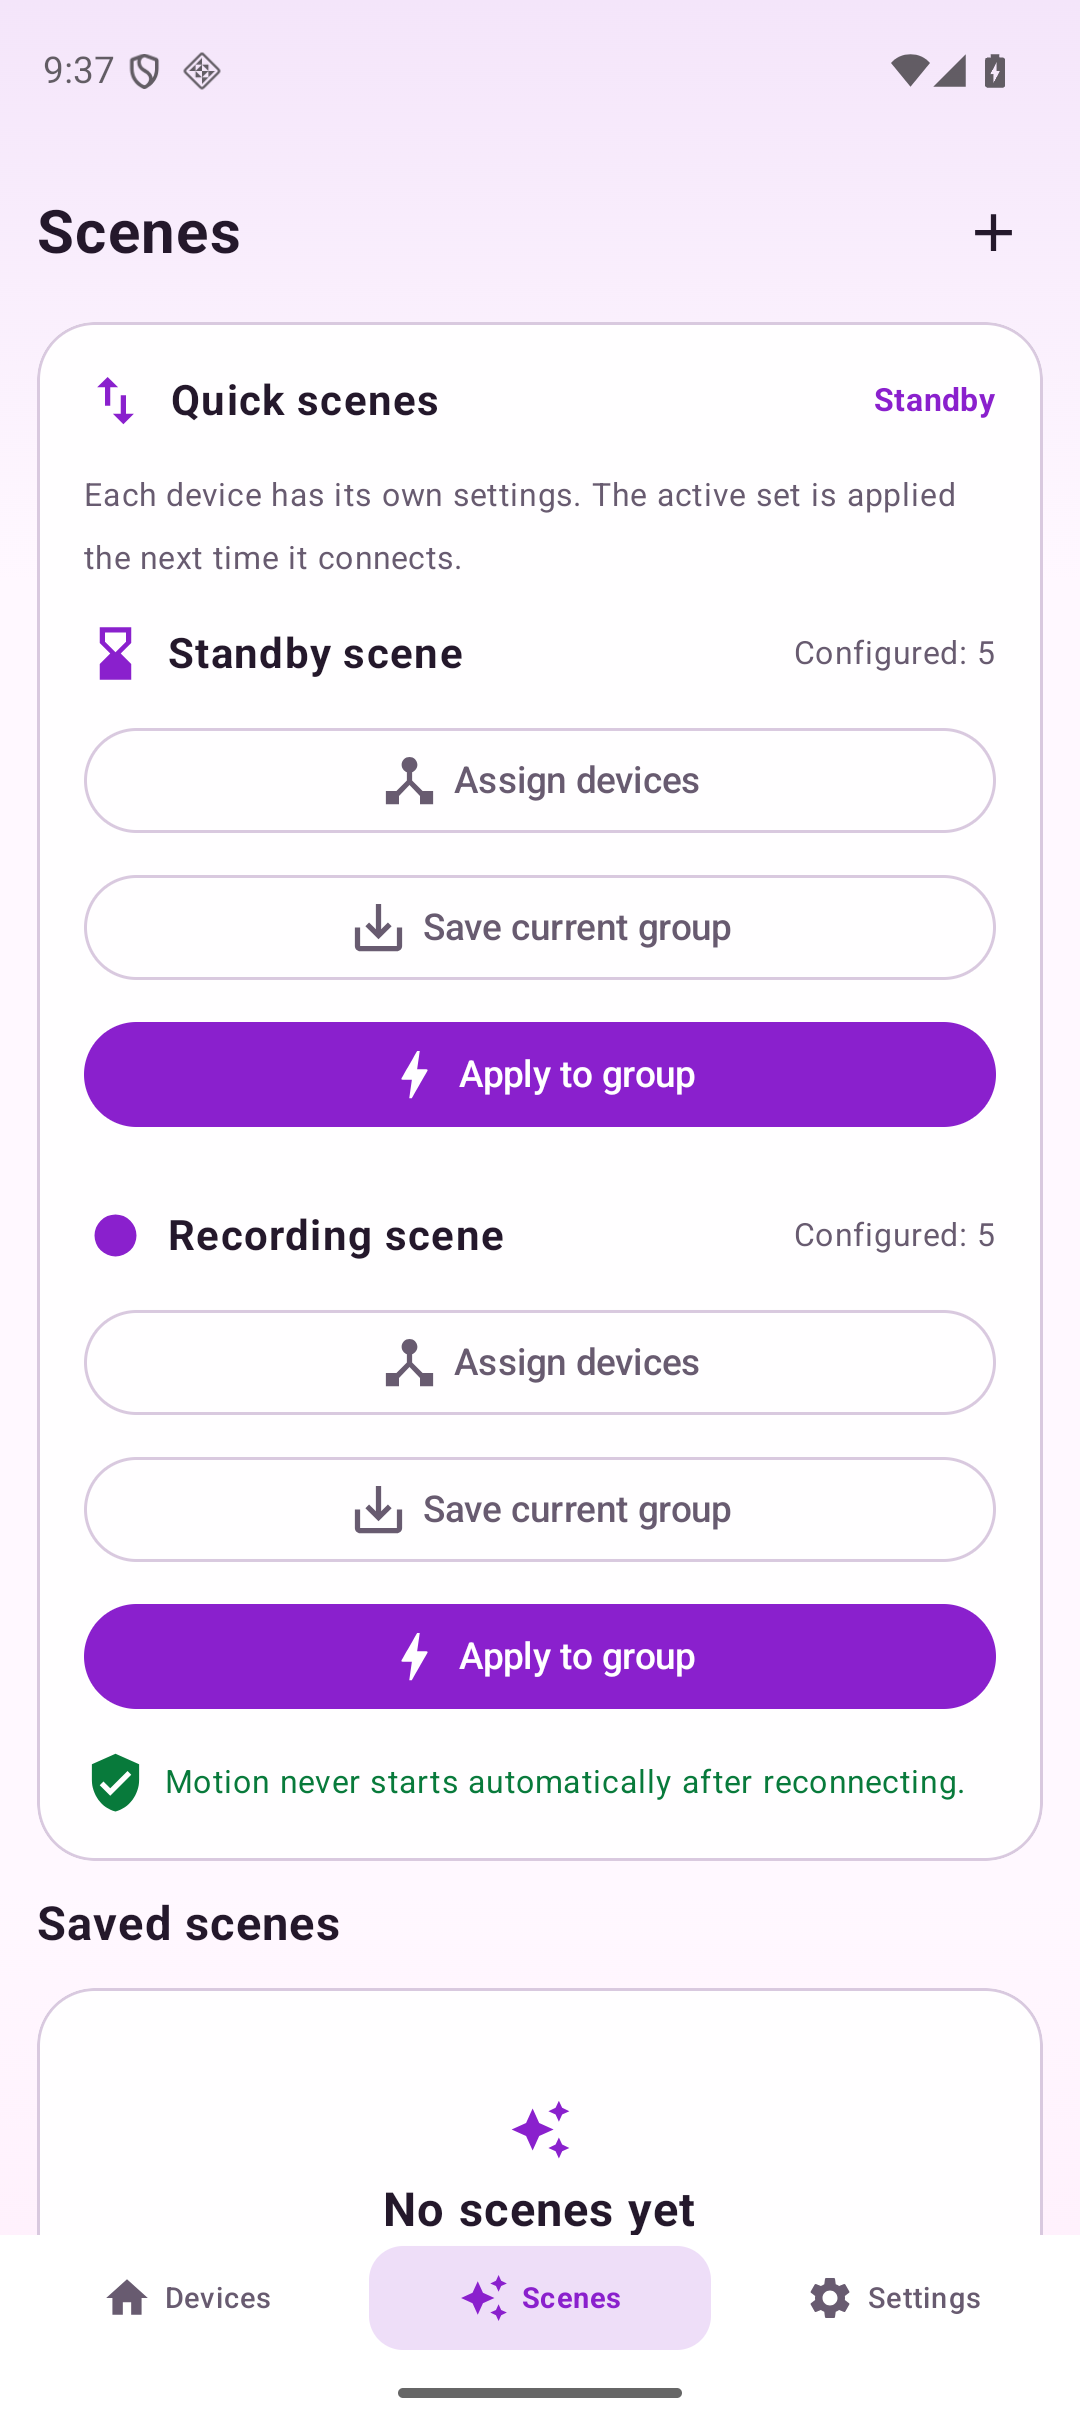
Section titled “Waiting and Recording Action scenes”These are two persistent operational profiles. A separate set of settings is stored for each device. The last Action scene applied is considered active and is restored safely when a device connects.
Movement devices also store an action:
- Do Not Change;
- Stop;
- Start after confirmation;
- in current GlamBot versions, Move to Pose and Stop after confirmation.
Custom saved scenes
Section titled “Custom saved scenes”On the Scenes tab, tap Save, enter a name, and capture the current state of every connected device. These scenes are useful for particular setups, clients, or locations. They restore settings but are not intended to start physical movement automatically.
Method 1: configure each device separately
Section titled “Method 1: configure each device separately”Use this method when you want to tune devices one at a time.
- Open Devices.
- Open the first device card.
- Set its required Waiting values.
- Under Device Scenes, tap Save Current Settings for the waiting scene.
- For Spinner360 or GlamBot, select a separate movement action.
- Set the Recording values and save the recording scene.
- Repeat for every BLE device.
- For GlamBot, use its Production tab and select the controller scene, pose, and action separately for each state.
Method 2: save the current state of the entire group
Section titled “Method 2: save the current state of the entire group”This method is faster, but it replaces the full saved membership of the selected Action scene.
- Connect every device that should be included.
- Manually configure lights, speeds, safety settings, and GlamBot scenes.
- Open Scenes.
- For the required state, tap Save Current Group.
- Check the device count shown next to the Action scene.
- Configure the setup for the second state and save the second group.
Important: if a device is offline when you tap Save Current Group, it is excluded from the new saved group. Always verify the online device list and count before replacing a group.
Map scene devices
Section titled “Map scene devices”A scene stores individual hardware objects. If a controller is replaced or its identifier changes:
- Open Scenes.
- Tap Configure Devices for the Action scene or saved scene.
- For each object, select a compatible connected device of the same type.
- Tap Done.
You cannot assign Spinner360 in place of a light controller or substitute one light model for another. The app lists only compatible devices.
Apply an Action scene
Section titled “Apply an Action scene”You can apply an Action scene from:
- Group Control on the main Devices tab;
- Apply to Group on the Scenes tab;
- Apply to All Devices in GlamBot’s Production section.
After applying a scene, the app shows how many devices were configured successfully and how many were unavailable.
When the scene contains movement
Section titled “When the scene contains movement”Before starting Spinner360, GlamBot, or a GlamBot move-to-pose action, the app displays a warning:
- Confirm that all work areas are clear.
- Tap Apply and Start only when movement is safe.
- Tap Cancel if the setup is not ready.
The option to stop asking again applies only until the app is closed. Movement confirmation is enabled again at the next launch.
What is restored after reconnection
Section titled “What is restored after reconnection”- active light mode, color/brightness/effect, and power;
- Spinner360 speed, acceleration, and BLE protection;
- selected GlamBot scene and pose plus safe settings;
- stop commands for movement devices.
The following are not restored automatically:
- starting Spinner360 rotation;
- starting a GlamBot scene;
- physically moving GlamBot to a pose.
This is intentional: losing and restoring a connection must not start mechanisms unexpectedly.
Quick group power controls
Section titled “Quick group power controls”The main dashboard has On and All Off buttons. They control supported lights but do not start or stop Spinner360 or GlamBot. Use Action scenes for a production transition that includes movement.
Recommended setup workflow
Section titled “Recommended setup workflow”- Connect every device and confirm that it is online.
- Configure and save Waiting, setting movement devices to Stop.
- Apply Waiting and verify the physical result on every device.
- Configure Recording. For the first test, leave movement set to Do Not Change.
- Verify lighting, color, and screen content.
- Clear the work areas and test Spinner360 and GlamBot movement separately.
- Only after testing, select Start or Move to Pose and Stop.
- Apply Recording, confirm movement, and make a test capture.
- Return to Waiting and confirm that the mechanisms stop.
Example group
Section titled “Example group”| Device | Waiting | Recording |
|---|---|---|
| MixUp White | 20%, on | 80%, on |
| MixUp Backlight v2 | Brand RGB color | White light or static RGB |
| MixUp Pixel v1 | Slow effect | Static color |
| Spinner360 | Working settings, Stop | Speed 35, smooth acceleration, Start |
| GlamBot | Scene 1, pose 1, Stop | Scene 2, pose 1, Start |
Troubleshooting
Section titled “Troubleshooting”Some devices did not switch
Section titled “Some devices did not switch”- Check the applied/unavailable result.
- Confirm that the device is online and mapped to the correct scene object.
- Reconnect the device and apply the Action scene again.
A light restored the wrong mode
Section titled “A light restored the wrong mode”Before saving, explicitly select the required final mode: brightness, color, or effect. These modes are mutually exclusive.
A mechanism did not start
Section titled “A mechanism did not start”Check its movement action, operator confirmation, and ready state. Automatic start after reconnection is intentionally blocked.
A scene shows “Not Connected” after replacing a controller
Section titled “A scene shows “Not Connected” after replacing a controller”Open Configure Devices and map the scene object to the new compatible controller.