Capture an image or record a 3D preview
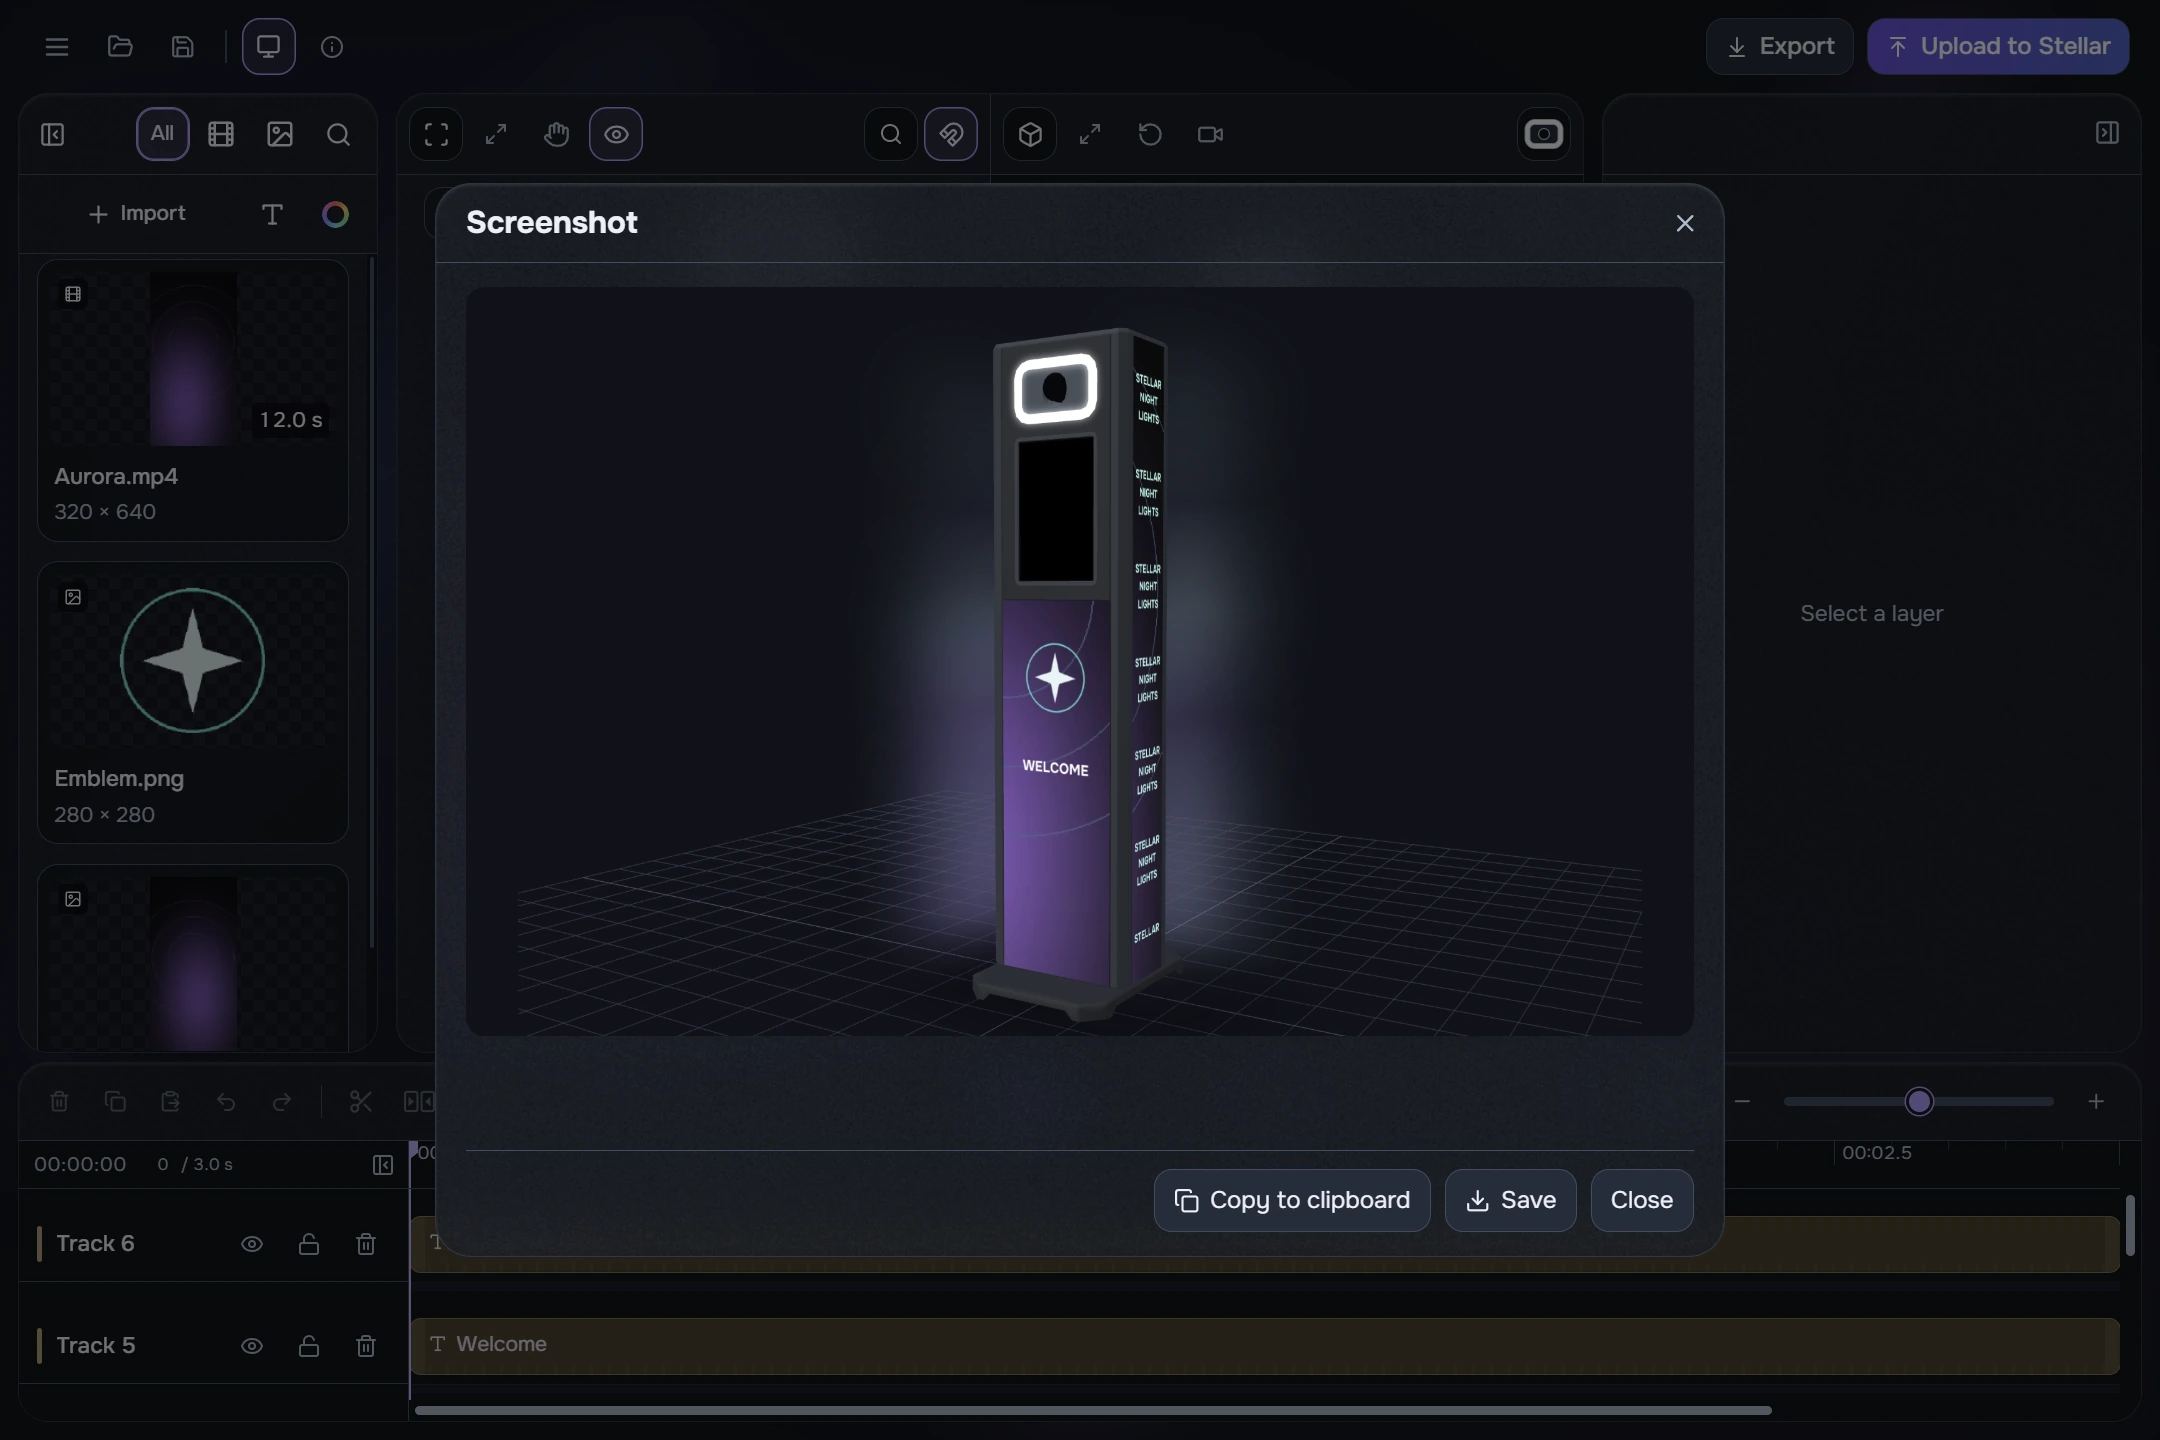
- Choose the model viewpoint and adjust its body, lighting and scene.
- Click the camera at the bottom right of 3D. After a brief flash, the completed PNG opens in a dialog.
- Save the image or copy it to the clipboard. Close the dialog to continue editing.
The screenshot is 1800 × 1200, with a 3:2 aspect ratio, and includes the model’s glow. It is a still of the selected 3D view. Presentation recording is described next; use Export for the booth’s screen content and Upload to Stellar to send it.
Record a 3D preview
Recording shows the project on the Stellar model from four sides at once. It is a presentation video for showing the result. Use regular export or Upload to Stellar for content intended for the physical controller.
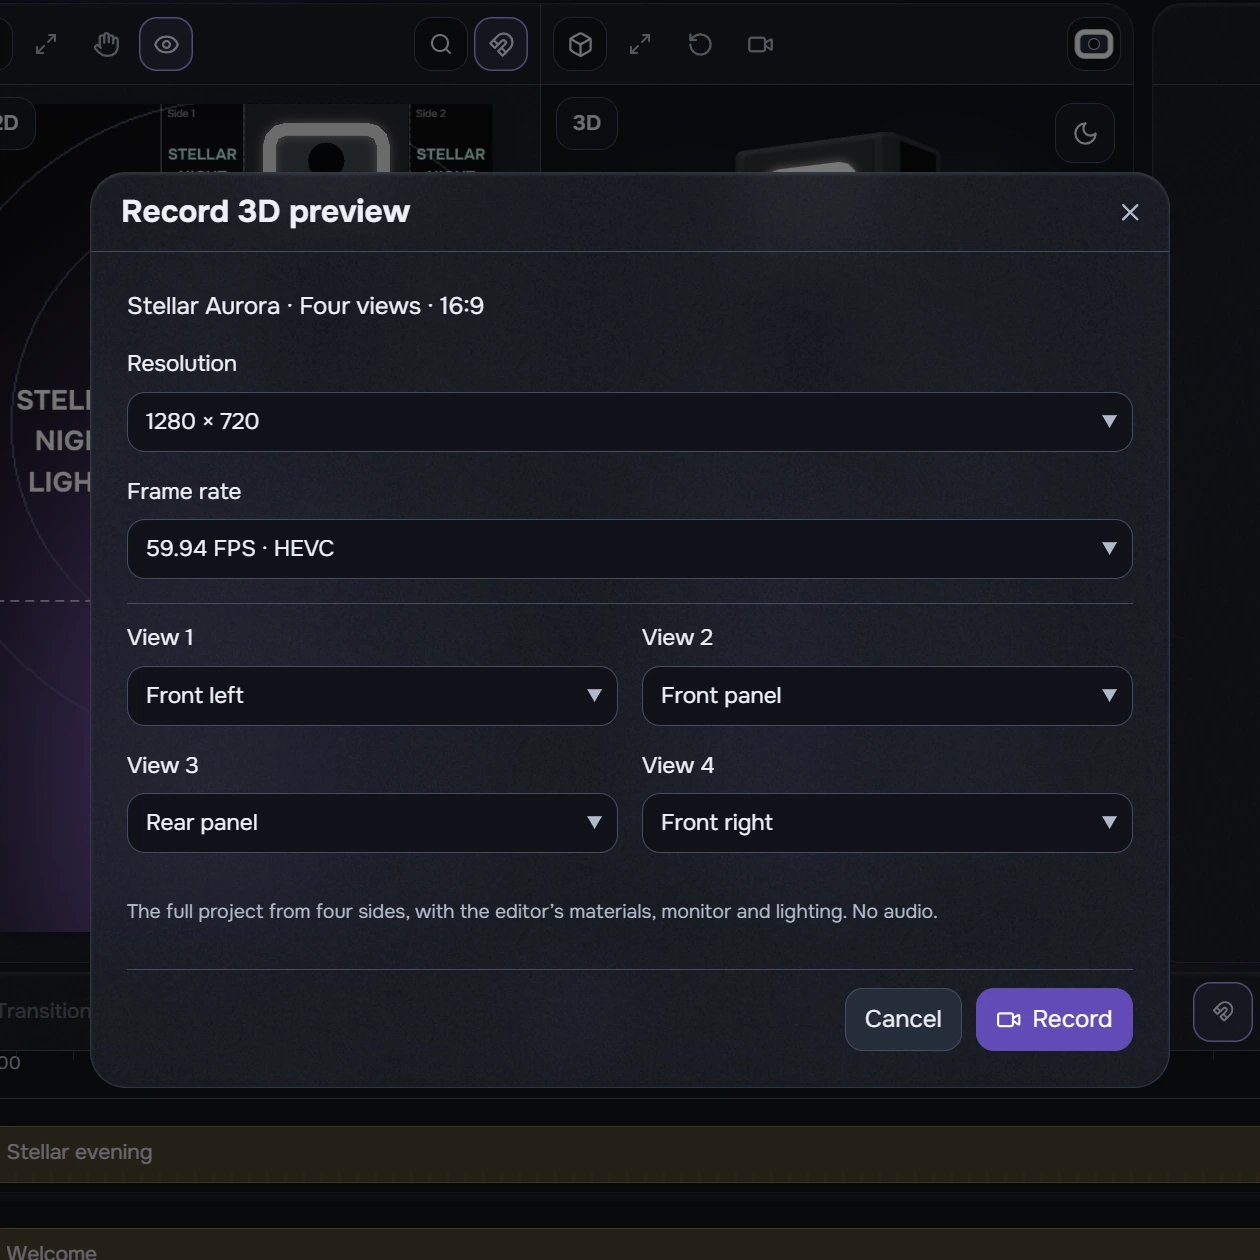
- Open a project and set up the body, monitor, lighting and scene theme in the editor.
- Choose menu → Record 3D preview, or click the video-camera button in the 3D toolbar.
- Choose 1280 × 720 (720p) or 1920 × 1080 (1080p) and 29.97 or 59.94 FPS. The result is one 16:9 MP4 with HEVC.
- Set View 1–4, ordered from left to right in the video. You can repeat a view in multiple fields.
Defaults are 1920 × 1080 and Front left / Front panel / Rear panel / Front right. The paired screenshots select 1280 × 720 and 59.94 FPS. Left, Right, Rear left and Rear right are also available, for eight directions in total.
3D recording progress
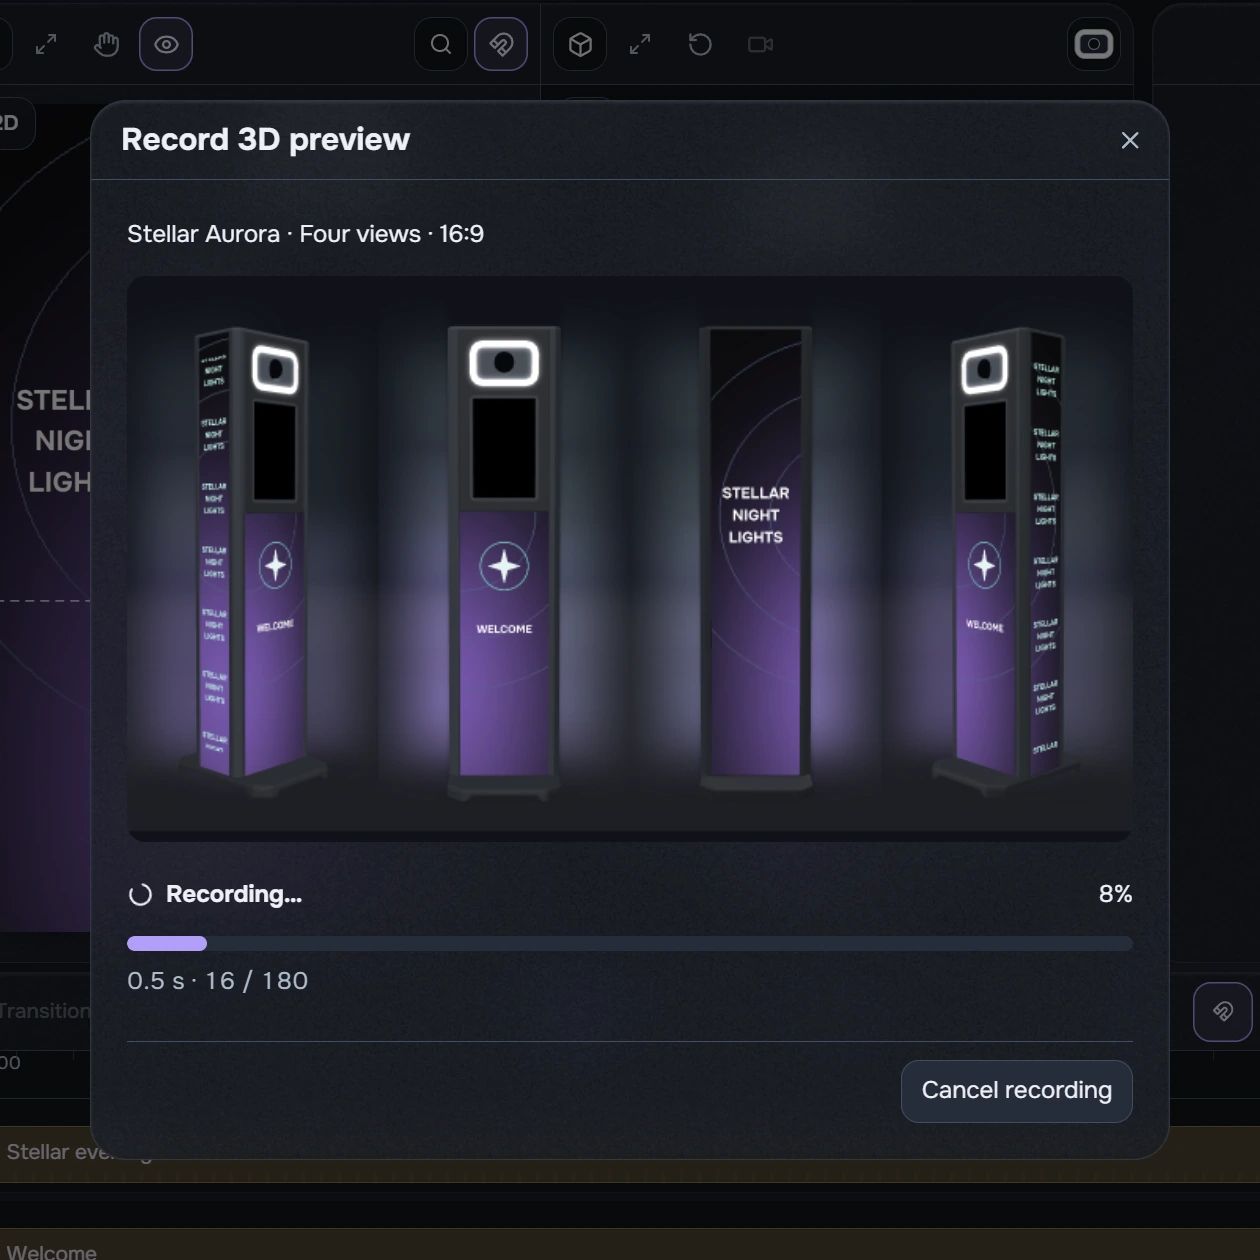
Wait for final-file verification. Cancel recording stops the job; an in-progress state is not a finished video.
Save the 3D recording
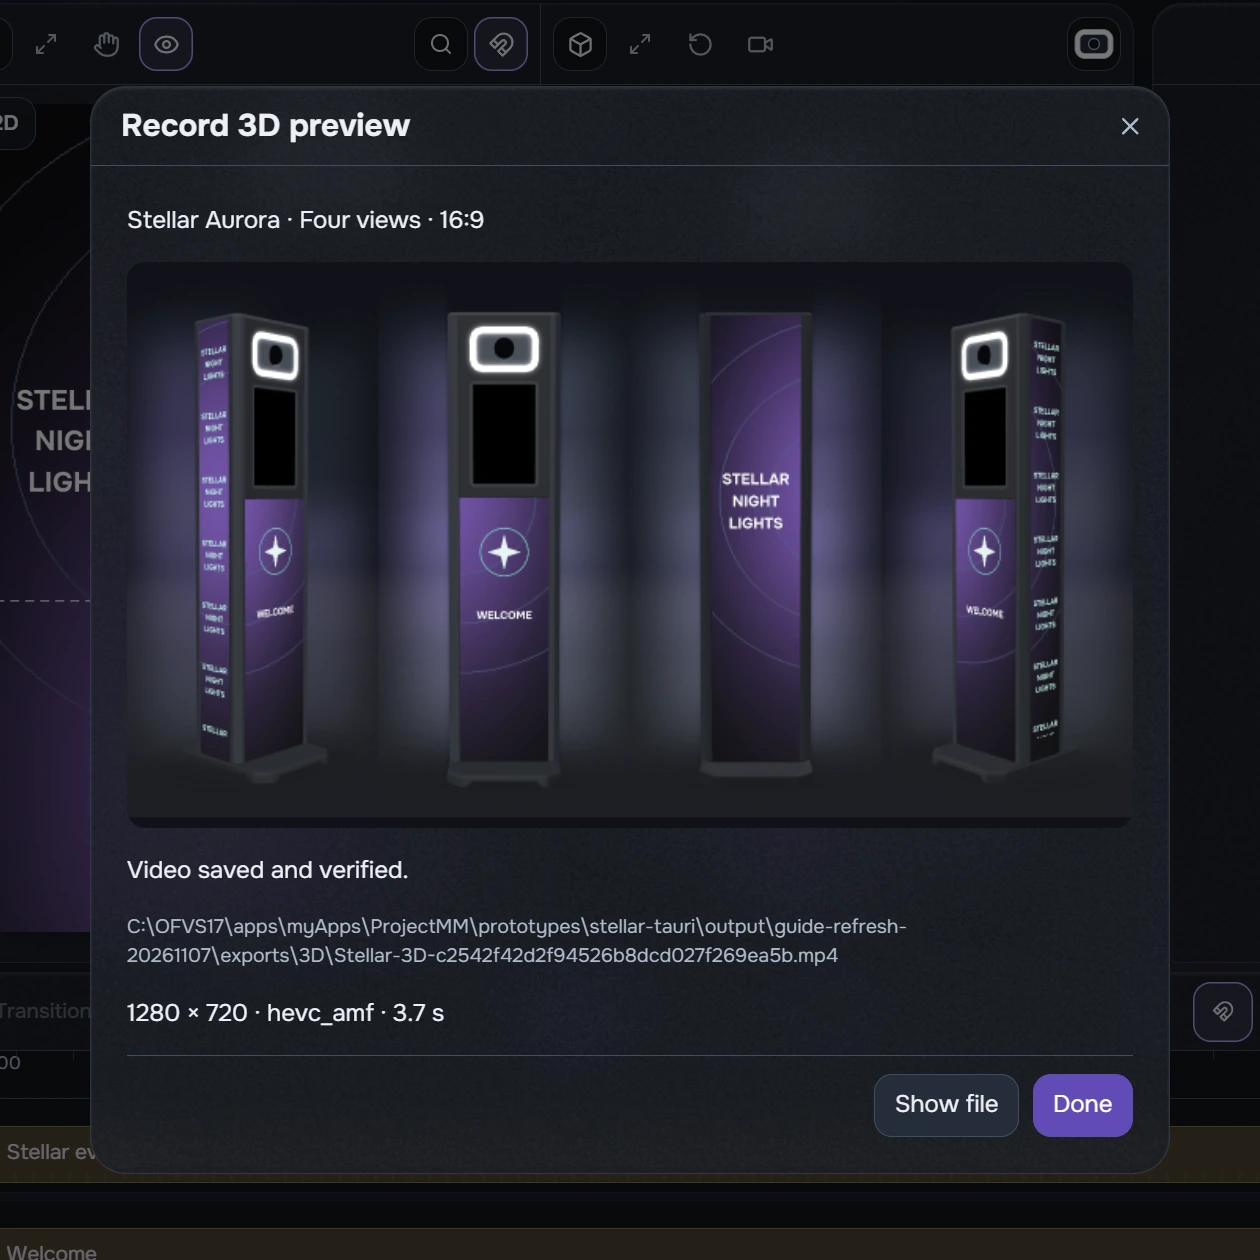
- Click Record. The dialog shows a frame preview, progress and the current stage. Cancel recording stops the job without placing a partial video among completed files.
- Wait for “Video saved and verified” and click Show file. On Windows, the result is saved in Exports/3D next to the application. The file is ready only after successful verification.
The entire project is recorded with fixed cameras, no audio and no motion interpolation. Materials, monitor, lighting and scene theme follow the editor. The video has no view labels or dividing lines; the floor is matte, without a grid. The interactive 3D preview keeps its grid.
Recording frame rate does not change the project. View choices last only while the dialog is open; reopening it restores the defaults.
If recording fails, close the dialog and retry. Try 720p if resources are limited.